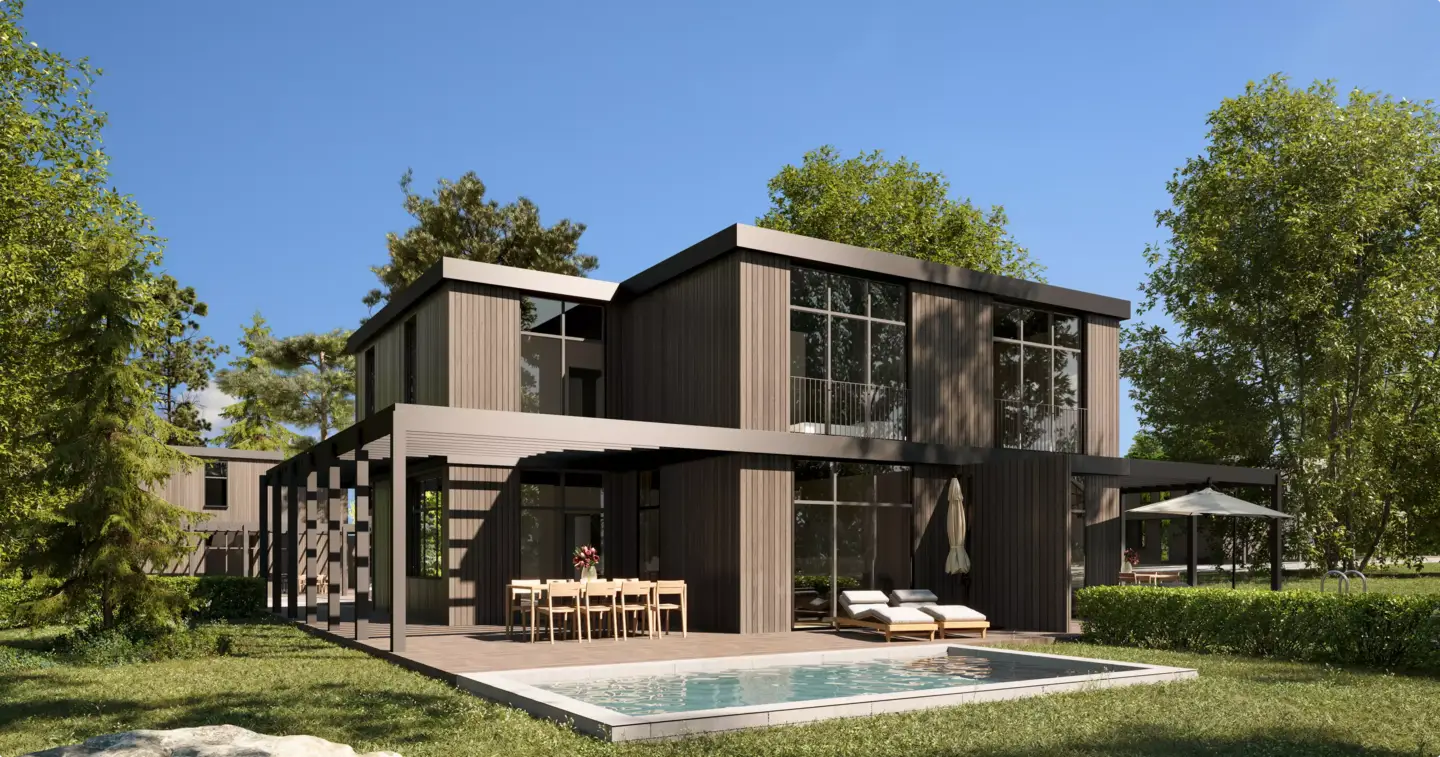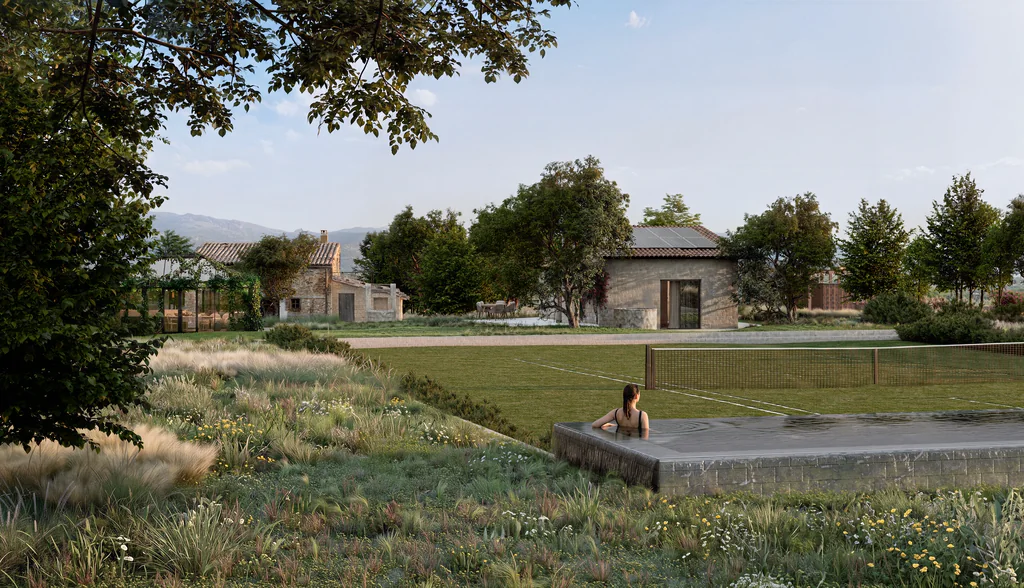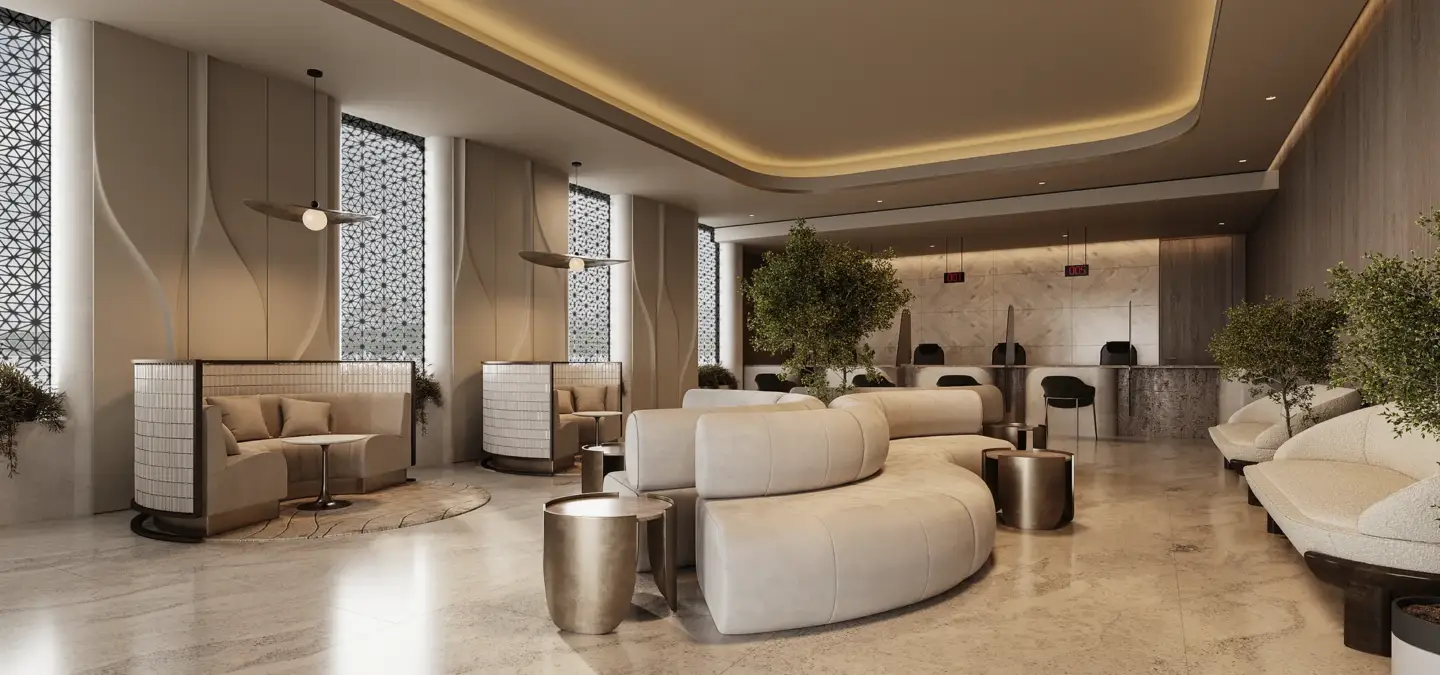
3D rendering is the process of turning a digital 3D model into a realistic image, animation, or interactive visual. It usually includes modeling, materials, textures, lighting, camera setup, rendering, and post-production, so the final result shows how a space, product, or object will look before it exists physically. Across architecture, products, advertising, games, and real-time experiences, Maverick Frame Studio’s 3D rendering services help turn source files, references, and production planning into visuals for design approval, sales, and marketing.
What 3D Rendering MeansWhat 3D Rendering Means
What is 3D rendering in practical terms? 3D rendering is the process of generating a 2D image, animation frame or interactive visual from a digital 3D scene. That scene includes geometry, materials, lighting, camera position, render settings and the creative direction that shapes the final look.
Rendering transforms digital data into something people can see, evaluate and use. It can be photorealistic, stylized, technical or cinematic depending on the project goal. The final output can be a still image, an animation, a 360 panorama, a virtual tour or a real-time scene.
How the 3D Rendering Process WorksHow the 3D Rendering Process Works
How does 3D rendering work? The software calculates how virtual light interacts with the geometry, materials and camera inside a 3D scene, then solves that lighting into a 2D image pixel by pixel. This rendering stage runs after modeling, texturing and lighting setup, and turns a digital scene into a finished, photorealistic frame.
The 3D rendering process works by building or importing a 3D model, assigning materials, setting lights and cameras, calculating how light interacts with surfaces, and exporting the final image or animation. A professional workflow also includes planning, review points and post-production so the output is accurate and useful. The process is part technical calculation and part visual communication.
| Stage | What happens | Client or team input | Output |
| Brief and references | Goals, use case, style and deliverables are defined | Drawings, sketches, references, brand notes | Project scope |
| 3D modeling | Geometry is built or cleaned up | CAD files, 3D files, dimensions | Digital 3D model |
| Materials and textures | Surfaces get color, roughness, reflection and detail | Samples, finish references | Textured scene |
| Lighting and camera | The scene is composed and lit | Preferred angle, mood, time of day | Draft preview |
| Rendering | Software calculates the final image | Approved scene | Rendered output |
| Post-production | Color, contrast and details are refined | Revision notes | Final image or animation |
A technical render can explain structure, function or layout, while a marketing render can create emotional appeal and conversion value. The production team needs to understand which job the image must perform before choosing camera angles, materials or lighting mood. That is why the first stage is not software, but a clear brief.
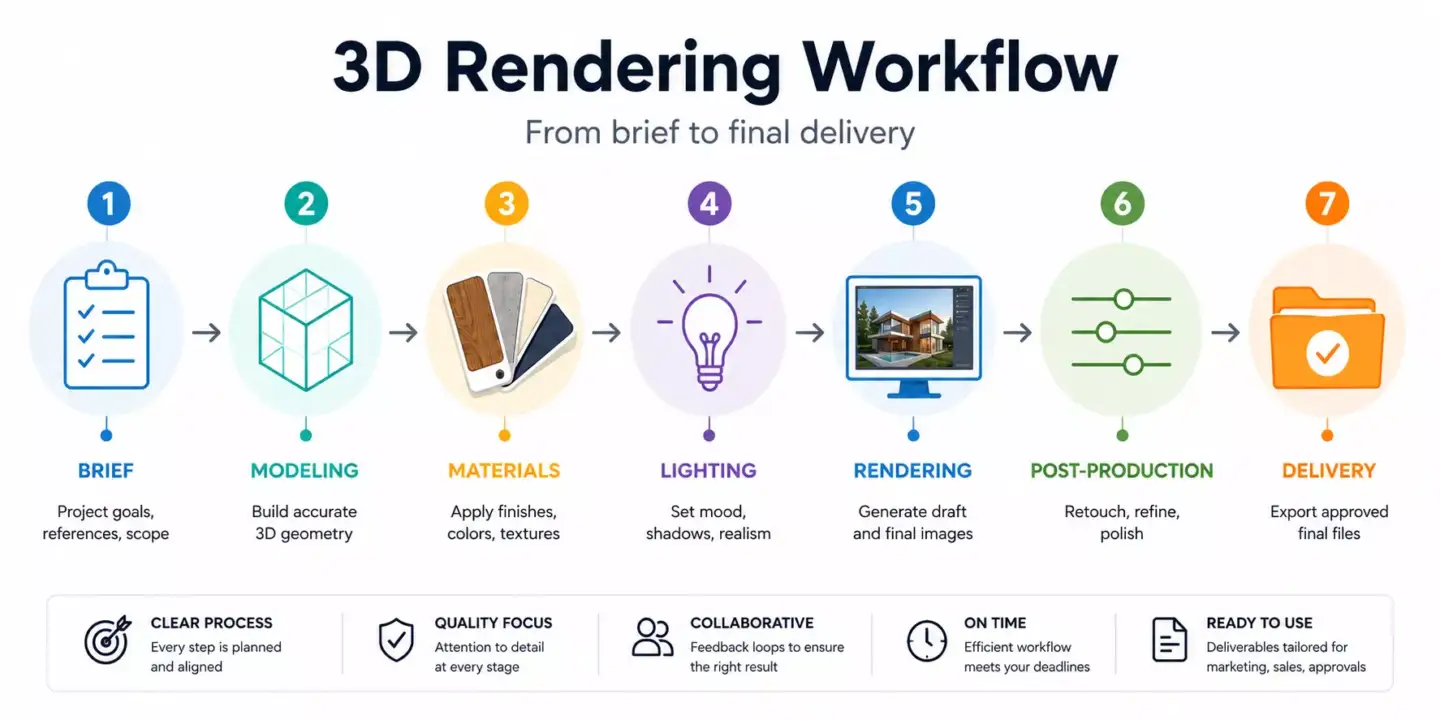
Step 1: Project Brief, References and Source Files
The process starts with a brief because the artist needs to know what the render must communicate, not only what object or space should be shown. A render for investor approval needs different decisions than a render for e-commerce, architectural review or a launch campaign. This early clarity prevents the team from polishing the wrong visual direction.
For architecture, the brief may include CAD drawings, Revit or SketchUp files, site photos, material references and notes about the intended audience. For product CGI, the input may include CAD files, STEP files, photos, dimensions, brand guidelines or prototype references. Deadlines and revision expectations should also be defined before the team begins production.
Step 2: 3D Modeling and Digital Scene Creation
3D modeling creates the geometry of the object, building, room or environment that will later be rendered. In architecture, building 3D modeling and rendering means creating walls, roofs, windows, floors, landscape elements and spatial details before materials or lighting are finalized. For product projects, modeling may focus on exact proportions, mechanical details, packaging shape or surface features.
Modeling quality affects every later stage because even excellent lighting cannot fix inaccurate geometry. Clean scale, correct proportions and organized scene structure make the rendering process smoother and more reliable. For architecture-heavy projects, architectural 3D modeling can support renderings, configurators, animations and marketing materials from a consistent digital foundation.
Step 3: Materials, Textures and UV Mapping
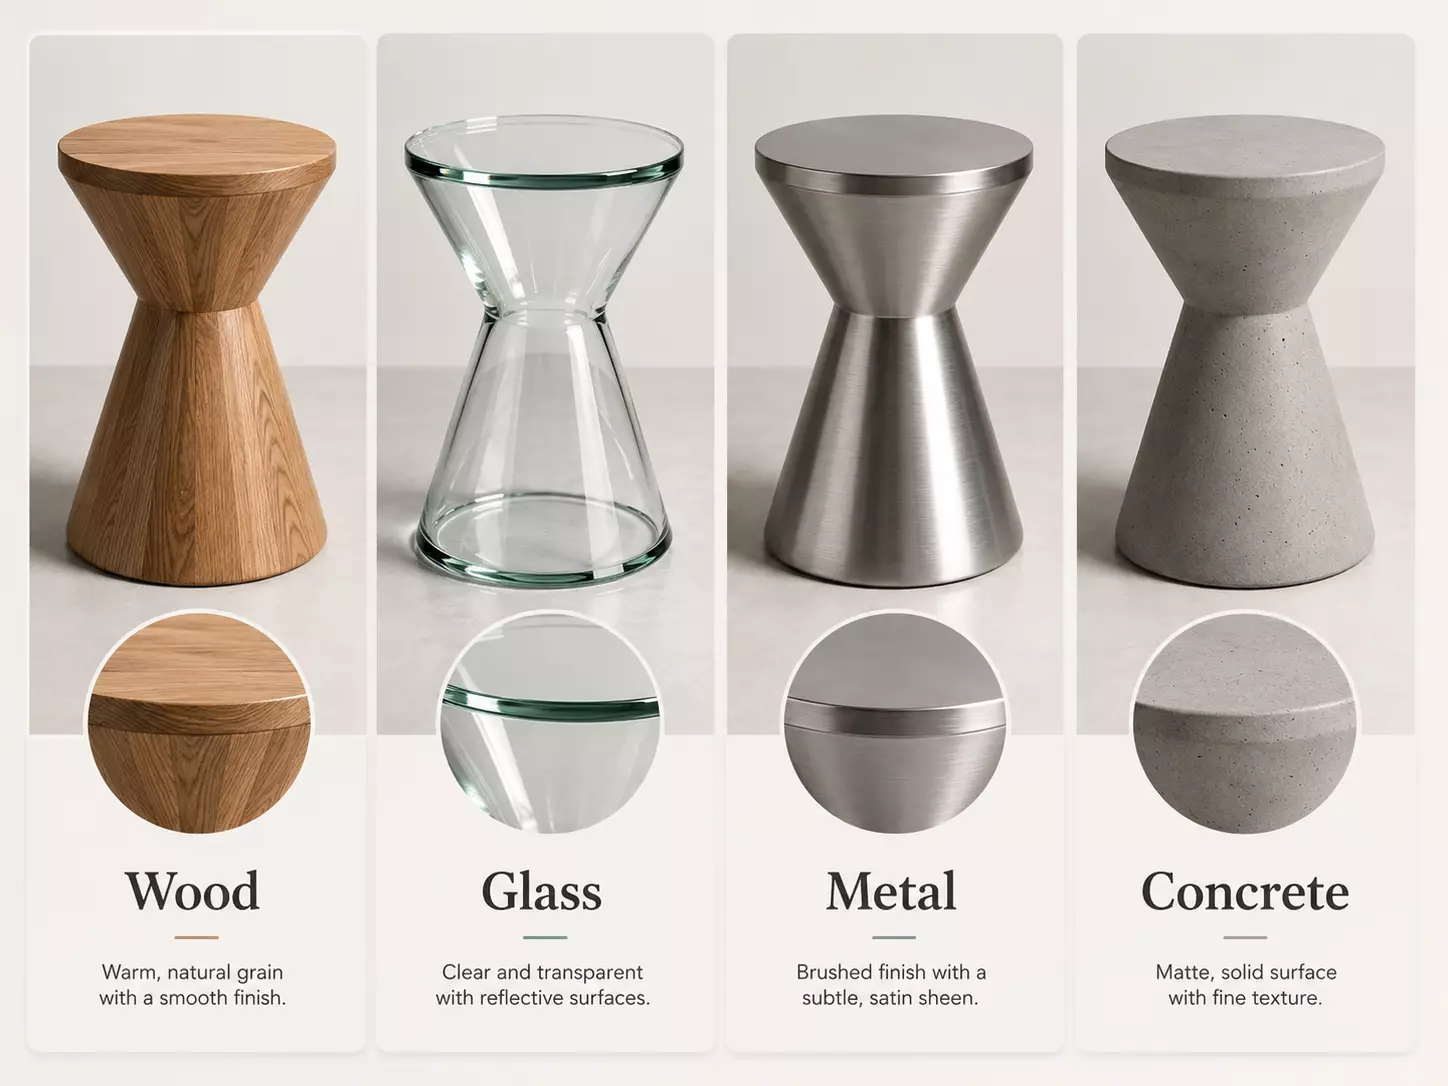
Materials and textures make a model look like real glass, wood, concrete, metal, fabric, stone, plastic or painted surfaces. Without this stage, even a well-built model looks like a gray plastic object. Materials define how surfaces absorb light, reflect surroundings, show roughness and communicate quality.
Texture work can include base color, reflection, transparency, bump maps, normal maps, displacement, scale and direction. UV mapping tells the software how a 2D texture should wrap around a 3D surface. In architectural CGI, a concrete wall, wood floor or glass facade only becomes believable when texture scale and material behavior match the real object.
Step 4: Lighting Setup
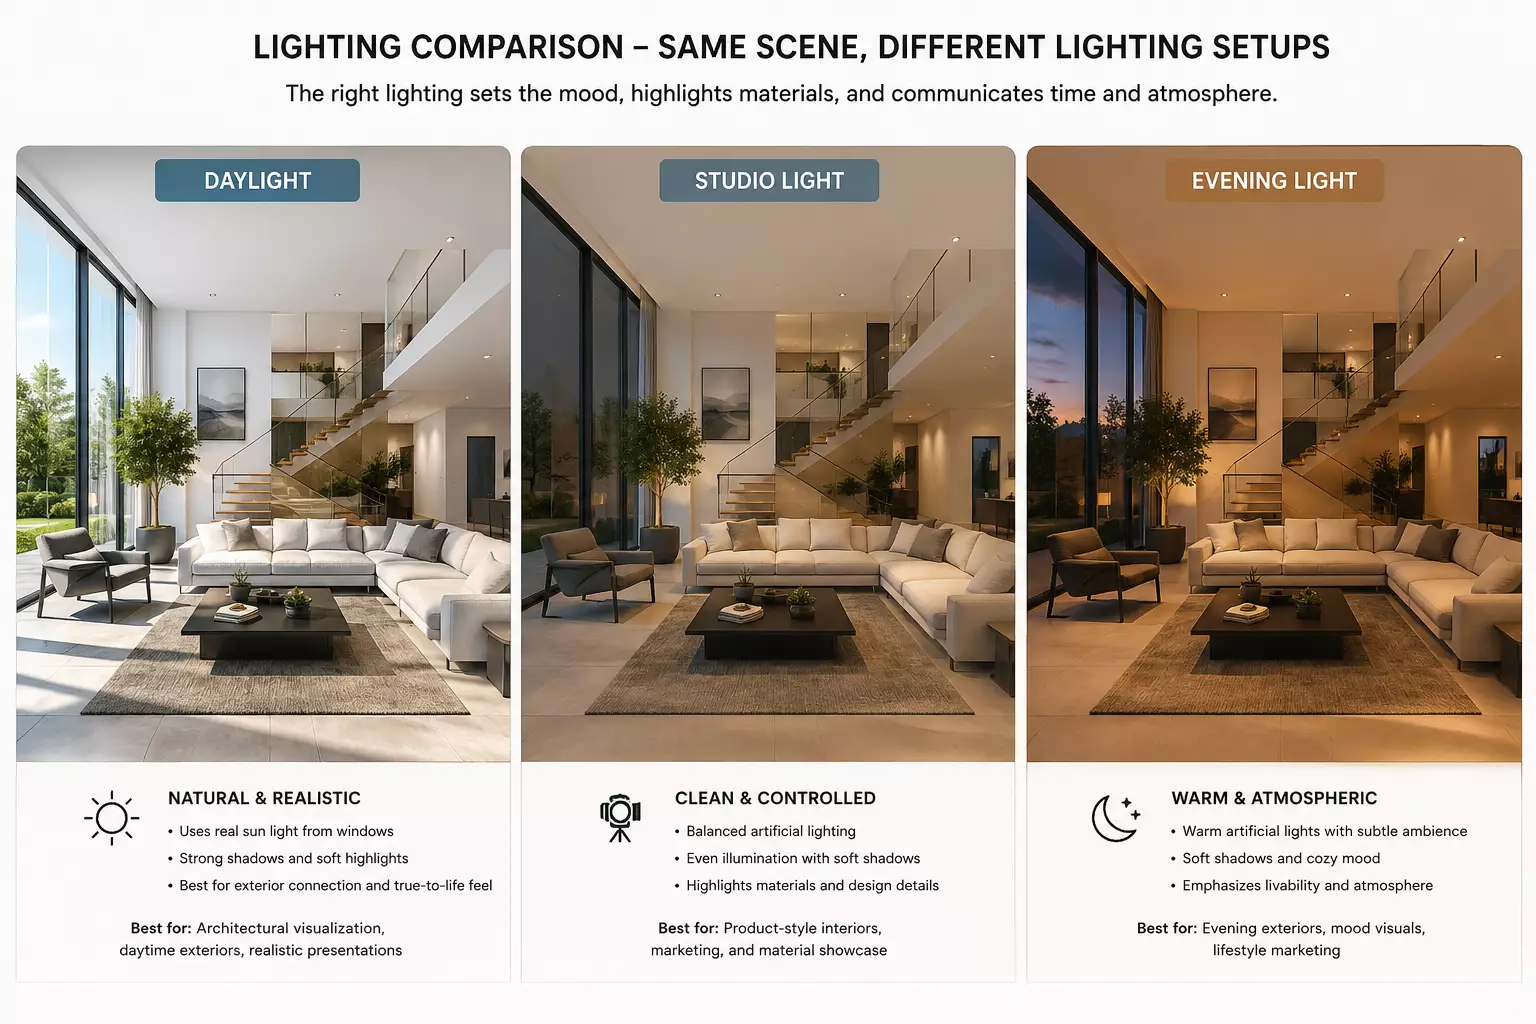
Lighting determines whether the render feels realistic, flat, dramatic, warm, commercial or technical. It controls shadows, reflections, contrast, depth and the emotional tone of the scene. A good lighting setup can make the same model feel like a daylight exterior, studio product shot, evening interior or cinematic campaign visual.
An architectural exterior may need sun angle, sky, facade shadows and realistic glass reflections. A product render may need controlled studio highlights that reveal shape without distracting from function. An interior render may combine window light, lamps and indirect bounce to make the space feel usable and comfortable.
Step 5: Camera Angles and Composition
Camera setup decides what the viewer sees, how the object or space feels, and which design or marketing message the render communicates. Camera height, focal length, perspective and framing can make a space feel open, compact, premium, technical or approachable. In professional workflows, camera approval often happens before final materials and lighting to avoid expensive rework later.
A hero angle is useful for a campaign, while a close-up angle helps explain craftsmanship, texture or product function. A street-level architectural view can show facade proportions more honestly than a dramatic aerial shot. An e-commerce product view should prioritize clarity, consistency and buyer confidence.
Step 6: Rendering the Scene Into an Image
Rendering is the calculation stage where software simulates how light interacts with objects and converts the prepared 3D scene into a final 2D image or sequence of frames. The render engine evaluates geometry, materials, lights, shadows, reflections, samples, resolution and noise. It is like taking a virtual photograph, except the camera, lighting and surface physics are calculated by software.
Some projects use ray tracing or path tracing to create highly realistic reflections and indirect light. Others use rasterization or real-time engines when speed and interactivity matter more than maximum offline quality. Render time depends on scene complexity, resolution, lighting, material detail, hardware and output format.
Step 7: Post-Production and Final Delivery
Post-production refines the rendered image so it looks polished, consistent and ready for its final use. This stage can include color correction, exposure balancing, contrast, compositing, sky integration, people, vegetation, small fixes and brand consistency. It should improve a strong render, not rescue a poorly planned scene.
Final deliverables may include JPG, PNG, TIFF, layered PSD, animation files, web-optimized images or high-resolution print assets. A campaign may also need cropped versions for ads, website banners, social media or sales decks. If motion is required, 3D product animation can extend the same CGI logic into sequences that explain movement, function and value.

3D Modeling, 3D Rendering and 3D Visualization Compared
3D modeling builds the object, 3D rendering creates the final image, and 3D visualization is the broader process of using 3D content to communicate an idea. These terms are related, but they are not interchangeable. Understanding the difference helps clients scope projects accurately and avoid gaps in production.
| Term | Meaning | Example |
| 3D modeling | Building digital geometry | Creating the shape of a building, product or vehicle |
| 3D rendering | Generating the final image or animation | Producing a photorealistic exterior render |
| 3D visualization | Using 3D content to explain or sell an idea | A full package with renders, animation and interactive views |
A model can exist without a finished render, but a finished render needs a prepared 3D scene. Visualization may include still images, animation, virtual tours, configurators and interactive experiences. This is why 3D modeling and rendering are usually connected inside one professional CGI workflow.
Software Used in the 3D Rendering ProcessSoftware Used in the 3D Rendering Process
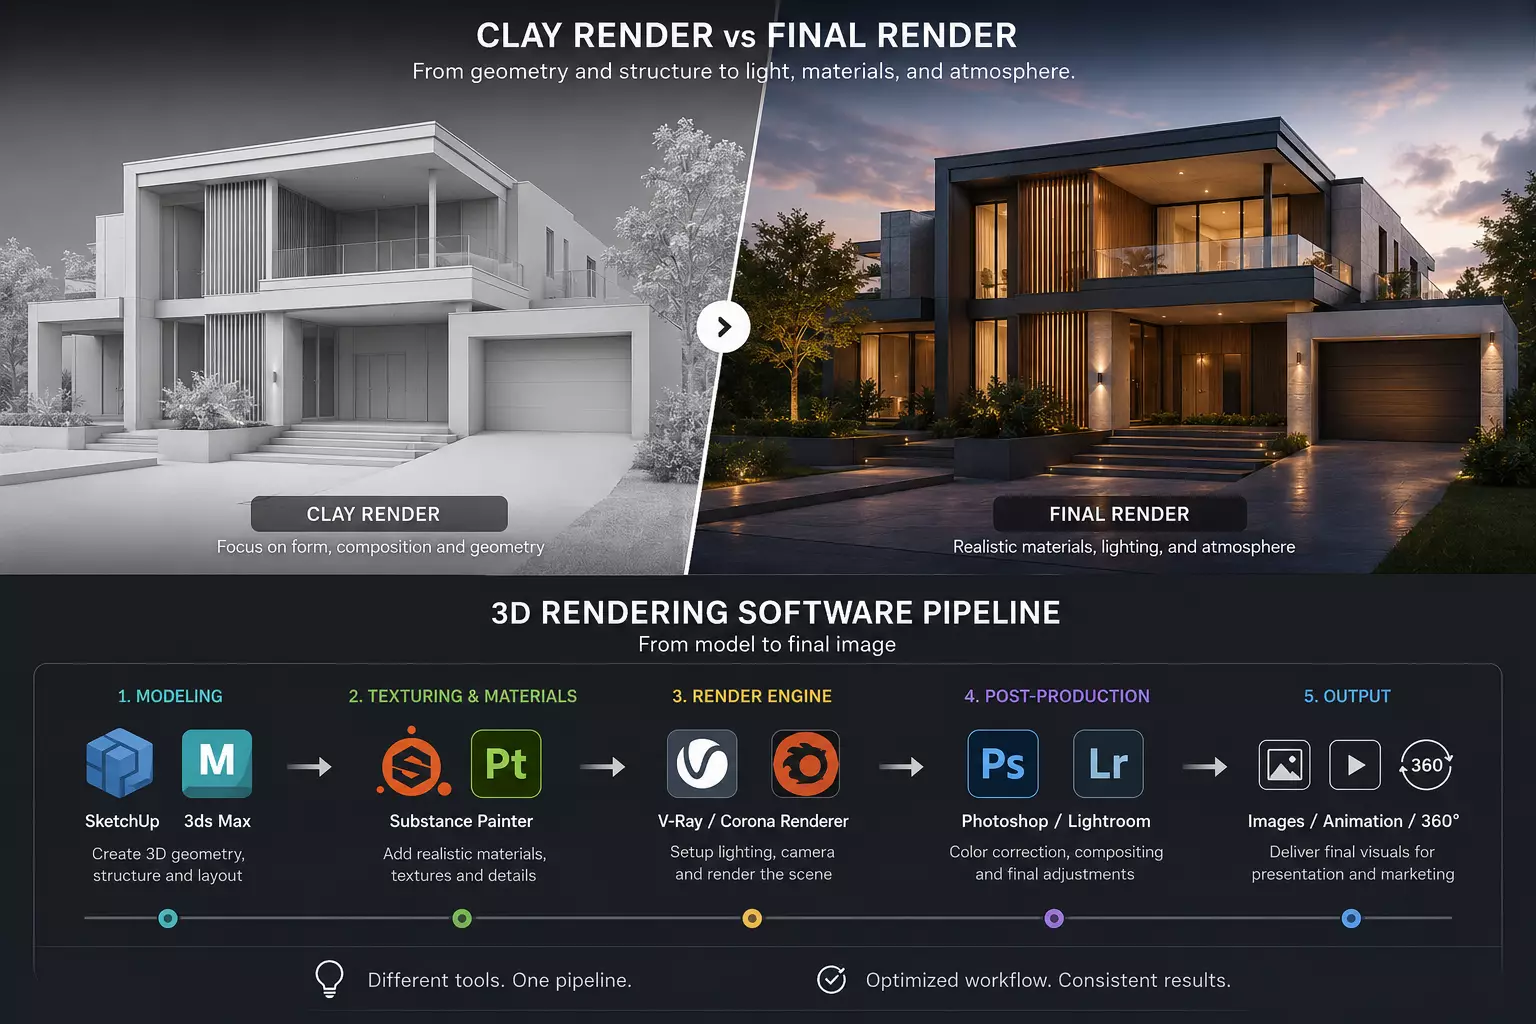
3D rendering software usually includes modeling tools, CAD or BIM tools, render engines, texturing applications and post-production software. The exact toolset depends on the industry, realism level, output type and production workflow. Software matters, but it does not replace a clear brief, clean model, strong materials and art direction.
| Software category | Common examples | Main role |
| Modeling and DCC software | Blender, 3ds Max, Maya, Cinema 4D | Build and organize 3D scenes |
| CAD and BIM software | AutoCAD, Revit, Rhino, SketchUp | Architecture, product and technical geometry |
| Render engines | V-Ray, Corona, Redshift, Arnold, Cycles | Calculate lighting, materials and final image |
| Real-time engines | Unreal Engine, Unity, Lumion, Twinmotion | Interactive previews, VR and walkthroughs |
| Texturing tools | Substance 3D Painter, Substance 3D Designer | Create detailed materials and surface properties |
| Post-production tools | Photoshop, After Effects, DaVinci Resolve | Refine final images and video |
This section should not be read as a software ranking. A simple tool can produce a strong result in experienced hands, while advanced software cannot compensate for unclear input or weak visual judgment. The best production pipeline is the one that fits the project’s accuracy needs, deadline and final use.
Real-Time Rendering and Offline Rendering Compared
Real-time rendering prioritizes speed and interactivity, while offline rendering prioritizes controlled image quality and realism. Real-time rendering is useful when designers, clients or users need to move through a scene and see fast feedback. Offline rendering is common for architecture, product CGI, advertising and film frames where final polish matters more than instant interaction.
| Rendering approach | Best for | Strength | Limitation |
| Real-time rendering | Games, VR, walkthroughs, configurators | Fast feedback and interaction | May require optimization |
| Offline rendering | Architecture, product CGI, advertising, film frames | Higher realism and control | Slower render times |
| Hybrid workflow | Reviews, previews and marketing | Combines speed and final quality | Needs pipeline planning |
Real-time workflows can support design reviews, configurators, interactive product tools and immersive presentations. Offline workflows are often preferred for hero images, luxury visuals and highly polished marketing assets. A hybrid workflow can use real-time previews to make decisions, then offline rendering for final delivery.
How the Rendering Process Changes by IndustryHow the Rendering Process Changes by Industry
The core 3D render process is similar across industries, but input files, accuracy standards, visual style and deliverables change. Architecture usually prioritizes spatial clarity, materials and context, while product rendering prioritizes form, finish and sales use. Advertising may prioritize mood and campaign impact more than technical explanation.
| Industry | Typical input | Main goal | Common output |
| Architecture | CAD, BIM, plans, elevations, site photos | Show unbuilt spaces clearly | Exterior renders, interiors, walkthroughs |
| Product design | CAD, STEP files, prototypes, brand references | Support or replace photography | Hero shots, e-commerce images, animations |
| Advertising | Creative brief, concept, brand assets | Create campaign-ready visuals | Key visuals, social assets, motion CGI |
| Automotive and marine | CAD, surface data, materials | Show form, finish and lifestyle context | Studio renders, lifestyle scenes, configurators |
| Film and games | Models, rigs, environments, simulations | Build worlds, shots and effects | Frames, sequences, real-time scenes |
For architecture, the emphasis is usually on buildable space, site context and stakeholder understanding. For products, 3D product rendering can create visuals before samples, photography or final production are available. For advertising, CGI can combine accurate assets with stronger art direction than a standard photoshoot can easily provide.
Architectural Rendering Process for BuildingsArchitectural Rendering Process for Buildings
Architecture is one of the most structured uses of the pipeline: it runs from drawings or BIM files through model cleanup, clay-render approval, materials, lighting, site context and post-production, because a building render has to read scale, proportion, facade logic and environmental context correctly. We break the building-specific workflow down stage by stage in our dedicated guide to the architectural rendering process.
In practice the work splits by deliverable. Exterior rendering tests facade perception, street context and massing before construction or marketing, while interior rendering evaluates daylight, material warmth and furniture scale — a technically correct room can still feel wrong if lighting or proportion is off.
How Long the 3D Rendering Process TakesHow Long the 3D Rendering Process Takes
The timeline depends on scene complexity, number of views, source file quality, resolution, realism level, revisions and whether the output is a still image, animation or interactive experience. A simple object or single architectural still is faster than a full package with multiple rooms, exterior context, animation and final marketing crops. Rush timelines can work, but they often reduce time for review and creative refinement.
Timing depends on a lot. A single interior render off a finished model is roughly 8 hours for us; an exterior is usually more, around 12 to 16. Animation and anything unusual we quote case by case — once we see what’s in the scene, the number moves fast.
From our studio — Dim Kuzmenko
Because the timeline moves with all of these variables, we scope every project individually rather than quoting a flat number — see our breakdown of 3D rendering pricing and turnaround.
A full workflow includes briefing, model preparation, clay previews, material look development, lighting, rendering, feedback and delivery. Missing drawings, unclear materials, late camera changes and vague revision notes can slow the project more than rendering itself. The process moves faster when one decision-maker collects feedback and approves each stage clearly.
What Affects 3D Render QualityWhat Affects 3D Render Quality
Render quality depends on model accuracy, material realism, lighting, camera composition, render settings, post-production and the clarity of the brief. A strong render is not only sharp or detailed, but visually useful for its intended purpose. The best quality comes from a controlled chain of decisions, not from one technical setting.
Nine times out of ten an ugly render is just bad lighting — colour pushed too far, the camera angle picked wrong. You see it instantly, before anything else.
From our studio — Dim Kuzmenko
- Clean geometry and correct scale.
- Realistic materials.
- Believable lighting.
- Strong camera angle.
- Good references.
- Enough render samples and resolution.
- Consistent art direction.
- Professional post-production.
- Clear feedback during revisions.
The weakest link usually appears in the final output. A perfect render engine cannot fix bad proportions, and good textures cannot fix unclear camera logic. Quality improves when the team checks geometry, materials, lighting and purpose before final rendering begins.
What Clients Need to Provide Before Rendering StartsWhat Clients Need to Provide Before Rendering Starts
Clients should provide enough information to remove guesswork, including files, references, dimensions, materials, project goals and final-use requirements. A professional studio can often work with incomplete input, but unclear information creates assumptions that may need revision later. The more specific the brief, the more efficient the workflow becomes.
- 3D model, CAD, BIM, SketchUp, Rhino or STEP files if available.
- Drawings, sketches, plans, elevations or sections.
- Dimensions and scale references.
- Material and finish references.
- Brand guidelines.
- Desired camera angles.
- Mood references.
- Deadline.
- Final output requirements.
- Revision contact person.
For architecture, site photos and material references are especially useful because context affects realism. For product rendering, dimensions, finish samples and brand direction matter more than decorative background ideas at the start. After gathering files, clients can contact Maverick Frame Studio to confirm scope, production stages and suitable deliverables before work begins.
Common Mistakes in the 3D Rendering ProcessCommon Mistakes in the 3D Rendering Process
Most weak renders fail because the process skips planning, uses poor references, approves the wrong camera angle or treats post-production as a fix for earlier production issues. A render can look visually impressive and still fail if it does not answer the project’s real decision question. Strong workflows prevent problems early instead of hiding them late.
Most projects don’t fail in rendering — they fail in revisions. Someone starts changing things for the sake of it: make the vase red, no, blue, now green, push the evening light a little. None of it changes what the render is actually for, but it eats the timeline and the budget, and somewhere in there the result starts getting worse, not better.
From our studio — Dim Kuzmenko
- Starting without a clear brief.
- Using incomplete files without clarifying assumptions.
- Skipping clay renders approval.
- Choosing decorative angles instead of useful views.
- Overusing generic materials.
- Ignoring real-world scale.
- Underestimating render time.
- Expecting AI output to replace controlled production.
- Giving vague revision feedback.
The most practical safeguard is staged approval. Approve geometry before materials, approve cameras before final lighting, and approve direction before expensive rendering time begins. This keeps feedback focused and reduces the risk of rebuilding polished scenes.
Where AI Fits Into the 3D Rendering ProcessWhere AI Fits Into the 3D Rendering Process
AI can speed up mood exploration, concept variation and some production tasks, but it does not replace a controlled 3D rendering pipeline when geometry, materials and accuracy matter. For early ideas, AI can help explore atmosphere, composition or style. For architecture, product CGI and marketing visuals, professional scene production is still needed when dimensions, surfaces, scale and revisions must be controlled.
AI can support moodboards, image enhancement, texture exploration and rapid creative options. It can also help teams compare visual directions before committing to a full scene. For campaign ideas that rely on surprising visual effects, CGI advertising services can combine creative concept development with controlled production instead of relying on uncontrolled image generation alone.
Why the 3D Rendering Process Shapes the Final ImageWe keep real people on the parts that matter — environment, greenery, water, all the detailing. That’s not something we hand to AI; someone has to sit and rework it until it reads right.
From our studio — Dim Kuzmenko
Why the 3D Rendering Process Shapes the Final Image
The 3D rendering workflow combines technical setup and visual direction to turn a model into a clear, realistic and usable image. It includes model preparation, materials, lighting, camera setup, rendering, post-production and final delivery. Each stage affects whether the final image is accurate, persuasive and useful for its intended business goal.
For architecture, product launches, vehicles, campaigns and real estate visuals, the process should be planned around the decision the render needs to support. A technical review may need clarity and precision, while a marketing campaign may need mood, story and visual impact. If the project requires an immersive format, 360 panorama services can extend static visualization into a viewer-controlled experience.
Heavy machinery pushes the same pipeline harder, as in this forestry equipment CGI.

Turn Ideas Into Visual Stories