Product rendering is the process of creating photorealistic 2D images of a product from a 3D model, using specialized software instead of a camera. Think of it as a virtual photo shoot. Brands use it to show a product in any color, angle, or scene — often before the real product even exists. A closely related niche is furniture rendering, focused on individual pieces.
That last part is where the magic hides. Your camera cannot photograph a product that has not been made yet. A render can. It can also show that product in forty colors, in ten rooms, from any angle, without anyone touching a physical sample.
This guide explains what product rendering is, how it works, and the main types you will run into. We will compare it with photography and with 3D modeling, look at the software studios use, and finish with real cost ranges. By the end, you will know exactly what you are paying for and why. Every product render begins with accurate 3D modeling of the object.
Product Rendering DefinedProduct Rendering Defined
A product render is a digital image built from a 3D model, not a photograph of a physical item. An artist builds the model, applies real-world materials, lights the scene, places a virtual camera, and lets the software calculate the final picture.
The result looks like a studio photo. The twist is that nothing in it is real. The leather, the brushed steel, the soft window light — all of it lives inside a computer. No product, no studio, no lighting rig.
Photorealism is a spectrum, not a switch. Some renders aim to look exactly like a photo. Others are stylized on purpose, with bold color or a clean studio look. Both still count as product rendering. The goal sets the level of realism, not the software.
You will also hear the word CGI. CGI simply means computer-generated imagery, and a product render is one kind of it. So when a studio says “product CGI,” they usually mean this exact thing: images of your product, made in software.
Why does any of this matter? One word: control. With a photo, you get what the camera sees on the day. With a render, you decide everything, down to the angle of a single highlight. Shopify has reported that shoppers who interact with 3D product content convert up to 94% more often. That is a large jump for one type of image, and product rendering is the first step toward it. Rendering sits inside the wider field of 3D product visualization, next to animation and interactive 3D. For online catalogs, see studios specialising in 3D renders for e-commerce.

Main Types of Product Renders
Not every render does the same job. A clean catalog image and a cinematic ad shot are built in very different ways. Here are the main types and when each one earns its place.
- Studio (packshot) renders — a clean product on a white or solid background. This is the workhorse of store listings and catalogs, and usually the cheapest type.
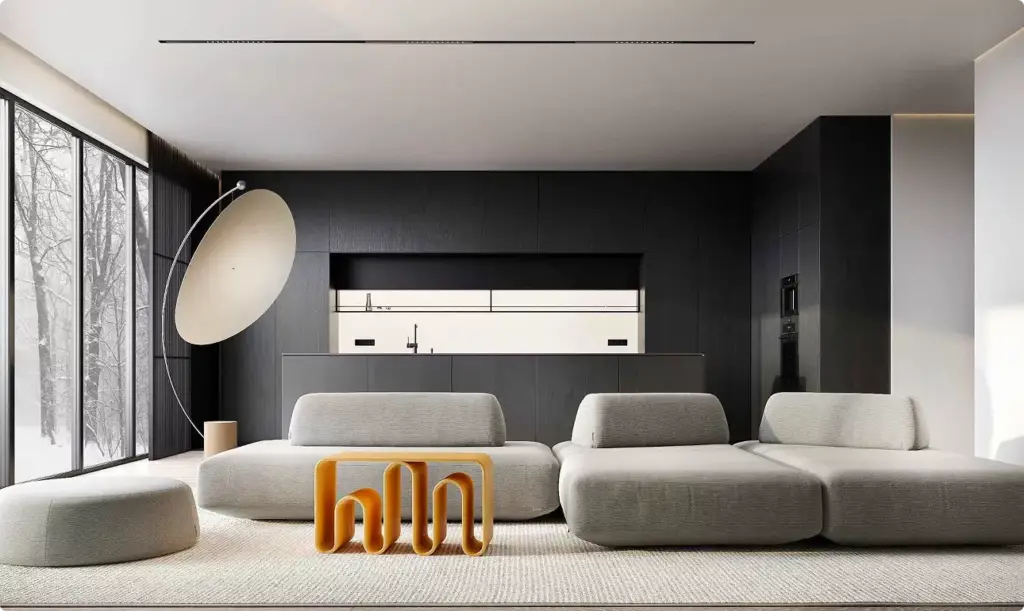
- Lifestyle renders — the product in a believable scene, like a sofa in a sunlit living room. These build desire, so they suit ads and brand pages.
- Hero and campaign renders — the showpiece image, lit and styled for maximum impact. This is the one that lands on the homepage or the billboard.
- 360° spins — a sequence of images stitched into a rotation the shopper can drag. They lift confidence on product pages because buyers see every side.
- Exploded and detail views — the product pulled apart to show parts, layers, and features. Useful for tech, hardware, and engineering.
- Product animation — the product in motion for video ads and social. See 3D product animation for the moving version of all this.
- AR and interactive 3D — a live model the buyer can rotate, zoom, and drop into their own room through a phone.
- Configurator renders — images that update in real time as the buyer picks colors, materials, or parts.
One quick note on detail. Some models are “low-poly,” meaning light and fast, which suits web and AR. Others are “high-poly,” meaning heavy and detailed, which suits hero images. The right choice depends on where the render will live, not on which sounds more impressive.

How Product Rendering Works
The process can look like a black box from the outside. It is not. It follows a clear path, and most projects move through the same six steps.
- Brief and references. The studio collects specs, dimensions, materials, and any sample photos. Good references make every later step faster and more accurate.
- 3D modeling. An artist builds an exact digital version of the product. This is the foundation, covered in 3D product modeling.
- Materials and textures. Real surfaces go on the model: brushed metal, matte plastic, woven fabric, glass. This step is what makes a render believable instead of plastic-looking.
- Lighting and environment. Virtual lights and a background set the mood, exactly like a physical photo studio. The same rules of soft light and shadow apply.
- Camera setup. A virtual camera frames the shot, chooses the angle, and sets the depth of field. Yes, even the lens is fake.
- Rendering and post-production. The software calculates the final image, then artists polish color, contrast, and small details.
Most product renders take three to seven days from brief to final image. Complex scenes, many angles, or animation take longer. The first image is always the slow one. After the model exists, new angles and new colors are fast and cheap.
Expect one or two rounds of revisions. You review the first draft, mark what to change, and the studio adjusts lighting, angle, or materials. Because everything is digital, most changes are quick. Moving a real product and re-lighting a real set is not.

Product Rendering vs Product Photography
Both methods end with a product image. They get there in completely different ways, and the gap shows up fast when you scale. Here is a direct comparison.
| Factor | Product Rendering | Product Photography |
| Physical product needed | No | Yes |
| Color and material variants | Unlimited, near-free | A new shoot for each |
| Speed for variants | Hours per image | Days per setup |
| Scenes and backgrounds | Any, fully virtual | Limited to real sets |
| Works before product exists | Yes | No |
| Edits after delivery | Easy, in software | Reshoot or heavy retouch |
| Cost of the first image | Higher | Lower |
| Cost at scale | Lower | Higher |
The math is a little brutal. One product, forty color options. With a camera, that is forty photo shoots. With rendering, it is one model and forty quick exports. This is why brands with large or customizable ranges switch first.
Photography is not dead, to be clear. For some products, a real shoot still wins. Food you can almost taste, fabric you want to feel, or a brand built on raw authenticity can all favor the camera. The smart move is often both: render the variants, shoot the hero.

Why Brands Use Product Rendering
The reasons come down to money, speed, and control. Here are the ones that actually move budgets.
- Show products before they exist. A render needs a design, not a finished unit. Brands launch campaigns and pre-orders weeks before the first product ships.
- Cut content costs at scale. One model can produce hundreds of images. No studio, no samples, no reshoots when a detail changes.
- Reduce returns. Accurate visuals set the right expectations. Fewer surprises in the box means fewer parcels coming back, which protects margin.
- Stay on brand. Every image shares the same lighting, angle, and style, across the entire catalog and every season.
- Sell more. That 94% conversion lift from interactive 3D is hard to argue with.
The savings can be huge. Some brands report cutting millions in physical sampling costs by rendering color and material options instead of producing them. One model can quietly replace a warehouse of samples. For online stores, rendering has stopped being a nice-to-have and is becoming the default way to make product images at all.

Software Used for Product Rendering
Studios use two kinds of tools. Modeling software builds the product. A render engine turns that model into the image. Many artists mix several, but these are the staples.
| Tool | Type | Best for |
| Blender | Modeling and render | All-round work, free, very popular |
| 3ds Max | Modeling | Industry standard for products and archviz |
| Maya | Modeling | Complex shapes and animation |
| Rhino | Modeling | Precise, CAD-style product shapes |
| V-Ray | Render engine | Photorealism, used across the industry |
| Corona | Render engine | Clean, realistic results with less fuss |
| KeyShot | Render engine | Fast product renders, loved by designers |
There is no single “best” tool, despite what the forums will tell you. Each studio picks what fits the product, the look, and the deadline. The skill of the artist matters far more than the logo on the software.
Product Rendering Best PracticesProduct Rendering Best Practices
A good render is not just a pretty picture. It is an accurate one that sells. Here is what separates strong renders from forgettable ones.
- Get the brief right. Most weak renders trace back to a thin brief, not a weak artist.
- Start with real dimensions. A render that lies about size creates returns.
- Use measured materials. Scanned or reference-based surfaces beat guesswork every time.
- Light like a photographer. Three-point lighting still works, even when the studio is virtual.
- Match the channel. A web thumbnail and a print hero need different levels of detail.
- Keep variants consistent. Same angle, same light, across the whole range.
- Plan for reuse. Build the model once, then harvest images, spins, and animation from it.
Who Uses Product Rendering
Almost any brand that sells a physical product can use it. A few industries lean on it harder than the rest.
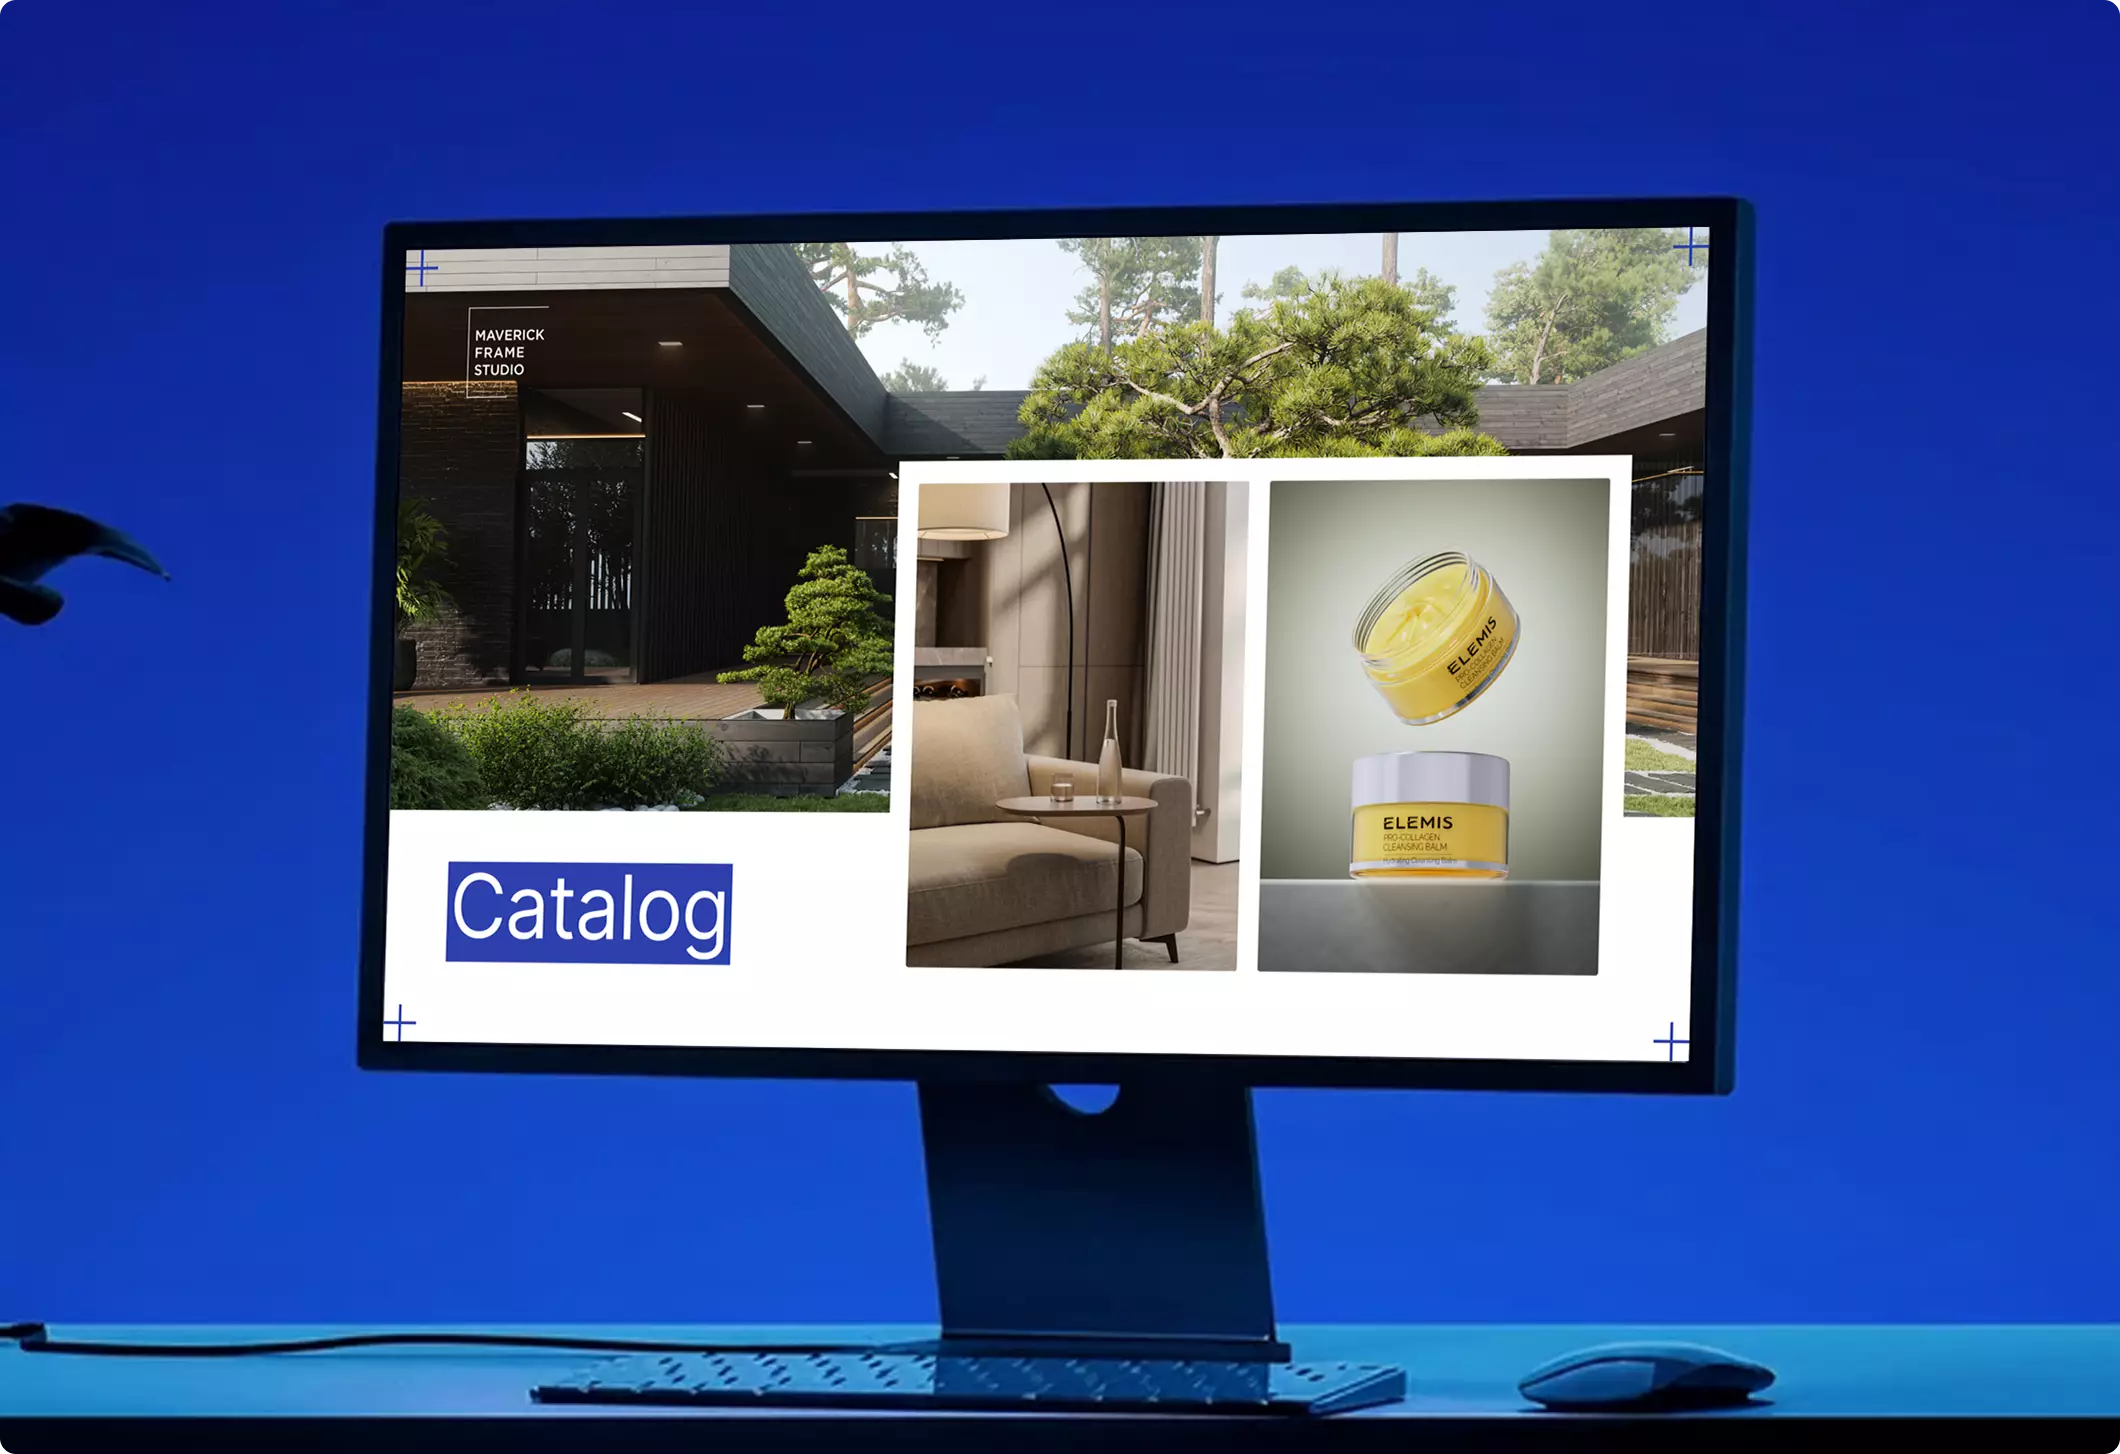
- eCommerce and DTC brands — for eCommerce-ready visuals produced at scale, across every SKU and color.
- Furniture and home — see furniture rendering, where a single sofa might need dozens of fabrics.
- Automotive — car and vehicle CGI for launches, configurators, and ads.
- Electronics and gadgets — clean detail shots and exploded views of tiny parts.
- Jewelry and watches — macro detail and sparkle that real cameras struggle to capture.
- Marketing and ad agencies — bold, impossible scenes that would cost a fortune to build for real.

Product Rendering vs 3D Product Modeling
People mix these two up constantly. They are two stages of the same pipeline, not two names for one thing.
| 3D Product Modeling | Product Rendering | |
| What it is | Building the 3D shape | Turning the model into an image |
| Output | A 3D file (geometry) | A 2D, photo-like image |
| When it happens | First | After modeling |
| Think of it as | The sculpture | The photo of the sculpture |
In short: modeling makes the object, and rendering takes its picture. You need the first to get the second. If a studio quotes you for “rendering” but you have no model yet, modeling is hiding inside that price. Always ask which stage a quote covers.
What You Need to Start a Product RenderWhat You Need to Start a Product Render
A good project starts with a good brief. You do not need to be technical. You just need to hand over the right raw material.
- Product specs and dimensions. Exact sizes keep the render honest.
- Reference photos or a sample. Even phone shots from a few angles help.
- Material details. Finishes, colors, fabric codes, or paint references.
- Any existing 3D model or CAD file. If you have one, it saves time. If not, the studio builds from scratch.
- The shots you want. Angles, scenes, and how many images.
- Where they will be used. Web, print, ads, or a configurator each have different needs.
If you do not have a 3D model yet, relax. Most projects start from photos, drawings, or CAD files. Building the model is part of the job.
How Much Product Rendering CostsHow Much Product Rendering Costs
Simple studio packshots usually start around $80 to $150 per image. More complex work costs more, because it needs more modeling and setup time. Here are rough starting ranges.
| Render type | Typical starting price | Notes |
| Studio packshot | $80–$150 / image | Clean background, single product |
| Lifestyle scene | $250–$600 / image | Built environment and props |
| 360° spin | From $400 / set | Many frames stitched together |
| Product animation | From $1,500 | Per short clip |
Three things move the price: how complex the product is, how many angles or variants you need, and how detailed the scene is. The model is the big first cost. Every extra image pulled from that model is far cheaper, which is exactly why rendering wins at scale.
For a full breakdown and a quote on your specific product, see our 3D product rendering services page.

Turn Ideas Into Visual Stories
FAQ
Product rendering is the process of creating realistic digital product images from a 3D model instead of photographing a physical item. A CGI artist builds or prepares the product model, applies materials, sets lighting and camera angles, then renders the final image. Brands use it for eCommerce, advertising, catalogs, launches, design review and sales presentations.
3D product rendering is used to create product visuals for online stores, marketplaces, paid ads, websites, catalogs, social media, sales decks and pre-launch campaigns. It is also useful for design review because teams can evaluate shape, materials, colors and finishes before final production. The same model can often support many future visual formats.
Product rendering works by turning product data into a digital scene. The studio starts with CAD files, drawings, dimensions or references, builds a 3D model, applies materials and textures, sets lighting and camera angles, renders the image and refines it in post-production. The final output can be a still image, animation, 360 spin or interactive asset.
Product rendering is better than photography when you need visuals before manufacturing, many color variants, consistent catalog images, impossible camera angles or reusable assets. Photography can still be better for simple one-off products, organic textures or cases where physical authenticity matters most. Many brands use both depending on channel, product type and future content needs.
Product rendering cost depends on product complexity, source files, materials, number of views, scene type, resolution, variants, animation and revisions. A simple product on a white background usually costs less than a lifestyle scene, jewelry render, technical product, 360 spin or product animation. The most accurate quote requires a shot list and source files.
3D modeling creates the digital product geometry, while product rendering creates the final image from that model. Modeling defines the product’s shape, dimensions and structure. Rendering adds materials, lighting, shadows, camera composition and post-production.
Yes, product renders can often be created before manufacturing if CAD files, technical drawings, dimensions or strong references are available. This is one of the main advantages of CGI. Brands can prepare launch visuals, investor materials, retail presentations or pre-order campaigns before the final physical sample is ready for photography.
The best files for product rendering are CAD, STEP, OBJ, FBX, STL or other 3D files, plus dimensions, drawings, reference photos, material samples, labels, color codes and a shot list. If no 3D file exists, a studio can often build the model from technical drawings, photos and measurements. That usually adds more modeling time, so stronger inputs help the project move faster.